Lowering and handling.
My suspension consists of the Hotchkis front coils and Hotchkis rear leaf springs, HAL QA1 12 point adjustable shocks on all four corners and a panhard bar.( both courtesy of Stan)
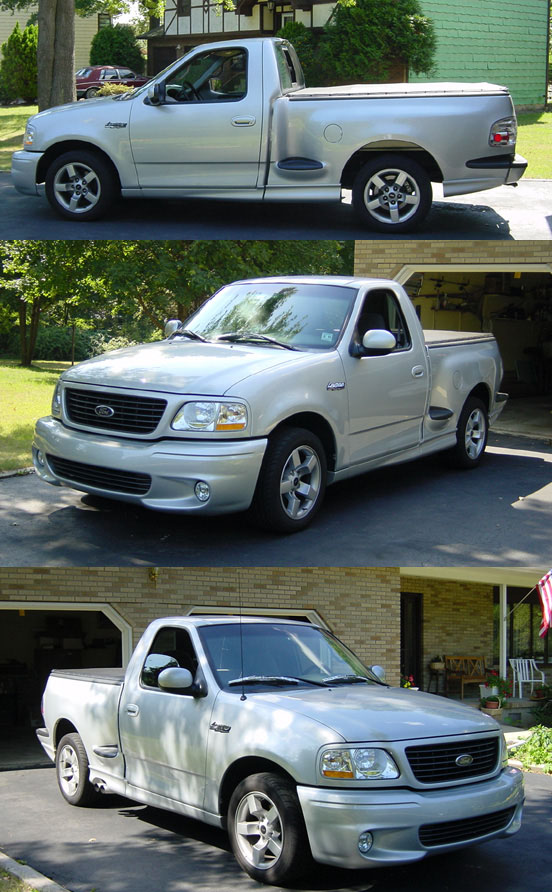
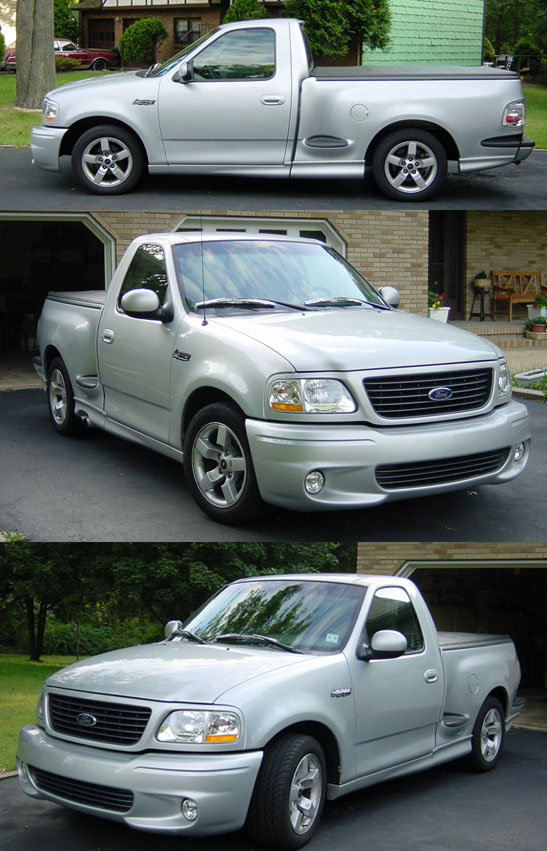
Here a some pics of my truck with Hothckis lowering kit: before / after .
The Hotchkis springs are noticably stiffer then the stock springs, which creates a more firm and at times a good kidney jolting ride. But with just the springs alone the truck felt more stable at all speeds and in cornering, and noticably reduced some body roll. The actual amount of drop is 1.25" in the front and 2" in the rear, this is after a about 7 months of settling. (Drop measurements are take from this thread.
|
Bump stops - at first I cut down the stock bump stops. After a while I noticed and felt the truck was hitting the bump stops on the more common larger bumps around here so I installed the bump stops that came with the kit. So far with the few extra tenths of inch suspension travel I gained with the new bumpstops I haven't hit them nearly as much. |
To soften up the ride a little and create a more controlled, predictable, and stable ride I opted for the HAL QA1 shocks. These are 12 point adjustable rebuildable shocks, 12 being stiffer and 1 being softer. Currently with my springs I have the shocks set 7 or 6 in the front and 5 in the rear for everyday driving. Once I get out on road courses and Auto-x this season I will test which settings are best for those. For the dragstrip, I will put the fronts at 11 or 12 and the rears at 1 to help shift weight to the rear for better traction. I give these shocks a big thumbs up and do recommend then for anyone concerned with ride quality and any type of racing. But I recommend that you change all 4 shocks instead of just the 2 rears if your doing 1/4 mile racing (all 4 will help more then just the 2 rears on launching). On a side note, pictures of these shocks will not be posted in respect for Stan so noone copies his work from me.
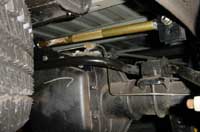
This is Stan (Ruslow's panhard bar). I keeps the rear axle and body more stable by preventing shift in hard cornering. It really does make a difference and the back feels more predictable and stable when cornering really hard.
Sway Bar Endlinks - on a whim I decided to try these out, for the fronts at least. Since the stock endlinks are 4 5/8" from center to center, and the front of my truck was lowered exactly 1.25", I calculated the new length of front endlinks that I need to correct the swaybar alignment would be 3 3/8". Installing them was a breaze, being a small person I just slid under the truck and installed them without even having to jack it up. As for performance increase, I don't know, haven't head any good tests yet. The last 5 out 6 times I took my truck out it has either rained or snowed!!!! You know the type of day, it's beautiful outside, you remove the truck from the garage, go on your merry way and then BAM! Mother nature attacks. Soon I will have reports of them.
Installation Tips
Front and Rear shocks:
These are pretty much a direct swap. The front shocks just jack up the front of the truck on jack stands, remove the wheels, remove the abs sensor clip, unbolt the shock from the bottom ( 2 nuts, the bolts stay in place) then unbolt the top nut and remove the shock. Place the new shock in and reverse the order.
The rears are just as easy, with one exception. The shock on the drivers side, the top nut of the shock is a pain to get to and when I removed it I only got about 1/8 of a turn at a time with a wrench. A socket wrench with a deep socket is to tight of a fit. The best wrench to use is one of the rachet type wrenches (the ones that looks like a wrench but works like a rachet).
Rear Leaf Springs:
Basically yet another direct swap. First jack up the back of the truck and place on stands, then jack up the axle enough to remove the tires. Once the tires are remove lower the rear axle slowy just enough take the load of the leaf springs or reduce the load as much as possible. Then loosen the bolts on the shackles, then the bolts on the hangers. The hangers took me a while b/c they are red loctite'd from the factory, so they take a little while to get loose. I used an impact wrench, though heating them will work to. Once your done with that remove the 4 bolts that connect the spring to the axle. Then remove the hanger and shackle bolts. Carefully pull the leaf spring out so you don't scratch anything. When installing my hothckis leafs I found it easier to pull the shackles out with the stock leafs and swap them onto the new leafs before replacing. Also remove both leaf springs before putting in the new springs.
Now for putting in the new leaf springs. What I did was first put the new leafs in, then out the hanger bolt in and loosely tighten the nut. Then I did the same for the shackle bolt. After that I did the same to the other side. Now that both leaf springs are loosely bolted in, the rear axle needs to be raised up to connect to the leafs (the hotchkis rear leafs have much less of an arch then the stock leafs). So I next jacked up the rear axle enough to touch the leafs. I then installed the bolts and loosely tightened them. After that it may take a few tries of lowering the axle and rotating it so that the pins and leaf springs are sitting properly on the axle. Then tighten. After you have the leafs tightened on the axle tighten the hanger and shackle bolts. Then put the truck back together and remove the jack and jack stands. With the truck on the ground I did a final check of all the work and tripple checked all the bolts to make sure they are tight.
Front Coil Springs:
Ah the front springs. These I didn't trust my knowledge or skills to do so the great folks at JDM Engineering.
Now if I did it myself I would have done one side at a time. First put on jack stands, then remove the wheel and shock. After that place a thick chain through the shock and A-arm in case anything slips. Next is to remove the shock. Then disconnect the swaybar. Place the jack under the lower A-arm and raise it just enough so you know there is tension on the jack. It would be easier to disconnect the upper A-arm at it's ball joint then the lower one. So remove the pin, and bolt. Either using a ball joint splitter or a rubber mallet, knock the ball joint loose. You could also remove the 2 bolts bolts that hold the upper A-arm to the frame if you don't want to undo the ball joints. SLOWLY use the jack to lower the lower control arm to uncompress the spring. Take the chain of and remove the spring when there is NO COMPRESSION on the the spring. Put in the new spring and reverse these instructions.
Now I can't say this enough: THESE SPRINGS HAVE HIGH RATES AND COMPRESSED, TAKEN EVERY PRECAUTION AND THEN SOME TO ENSURE YOUR SAFETY. All it takes is one slip and these springs can shoot out, and they will do damage.
On a side note, there is always better ways to do something. These ways worked for me. They were not the quickest, but I was comfortable with what I was doing. Don't be afraid to go outside the lines if you find another way that is easier or more comfortable for you.