Painting the Plastic Parts
This whole process is really not that hard. It just requires some patience, unfortunaly I don't have much of that but I worked through that. The whole process inlcudes prep work, base coat, painting, top coat, buffing. The beginning stages are the most imported, the prep work is the most time consumming and important step. The base coat helps get out those little abnormalities, so that by the time the paint and topcoat comes along it's as smooth as possible and very little sanding is require. So lets go one step at a time. For more pictures please see the following pages:
Click on pick for more pics of what I've painted
Paint Process
Preping
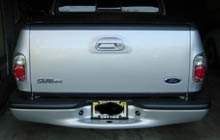
- Obviously the first step is to remove what ever it is you want to paint.
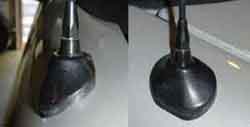
- Then the sanding, the object of this is to get it smooth and any deep scratches, knicks, rough spots out. You don't want it perfectly smooth because the paint does have to stick to it, and paint adheres better to slightly rough surfaces then glass smooth ones. With that I started out with 240 grit sandpaper for the bolk of the work. Once I got most of stuff out that I wanted I switched over to 320 grit to make it smoother. After that I did a little bit of wet sanding with 400 grit. This left the plastic pretty smooth but still rough enough for the paint. Like this.
- After sanding it's time to remove all that wonderfoll dust. Best way, wash it in some warm soapy water then let it dry.
- Now the basic prep is done, easier written then doing it
Base coat / sandable primer
- If your painting a plastic piece, before you basecoat/prime the parts, I woold recommend a coat or two of adhesive promoter. This will help the paint to stick better, and will only add about 20 minutes to the whole process. (always follow spray can instructions.
- Now you are ready to basecoat your piece. Since most basecoats are sandable primers, it works out well. Grab your can of sandable primer and give it about 3 coats. And time to dry. I used moms hair dryer to speed up the process, but be carefoll, you can get into trouble as I did.
- Sand the primer done. Since you spent so much time getting the piece smooth there shooldn' t be much sanding here. But the primer will show anything you missed, so fix it. Remember smooth!. If you need to do some heavy sanding and spray the primer back on, so be it. Better to go through the work be anal then to have to deal with some imperfections.
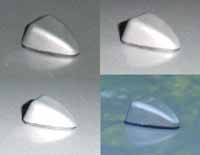
- Know that you have a good primer coat and it's sanded done smooth, give it a little extra time to dry, go get lunch. At this point it shoold look like this.
Painting
- Now you get to paint the thing. Do about 2 or 3 LIGHT coats of paint. And give it plenty of time to dry, you don't want to screw up here.
- Give it a light wet sanding with no lower then 400 grit paper. Very light. Then return back to your warm soapy water to get the sanded material off.
- When everything is dry give it some more light coats of paint until your satisfied.
- Let it dry.
Clear coats
- Give 2 or 3 clear coats and let it dry
- At this point some people like to do another light wet sanding between clearcoats, I didn't try this so I have no opinions on it.
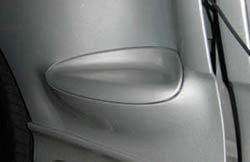
- Let it dry for a long time before you put the part back on. Then your all done.
Buffing
- First thing soak 2000 grit sandpaper in some soapy water for a while.
- Wetsand the clear coat til it's hazy. Make sure it is wet at all times.
- Pull out the wax and buffing wheel, go to town until your satisfied.
Some more tips:
- do not paint on damp days, if you must give it plenty of time to dry, and
I mean plenty!
- put the cans of spray paint in warm water, it will help thin the paint
- shake well
- don't be afraid of sanding, have alot of sand paper, and wet sand, it really does help out in the overall finish
- don't rush, whatever time the spray can says it takes to dry, follow.
- buffing helps
- alot of thin coats, it will dry faster and help reduce bubbling
- make 100% sure that your sandable primer coat is perfect before you apply the actual paint. The primer is meant to be sanded and worked. The actual paint and clearcoat shoold just be a cover, not to even anything out or
remove/cover any imperfections.